Introduction
When designing any artifact one crucial step is iteration. Being able to iterate quickly and effectively can not only speed up the final products creation, but also allows for much more exploratory design. Further, when looking at the prices of PLA filament versus having custom prototype parts machined, the benefit is clear.
Rapid Prototyping
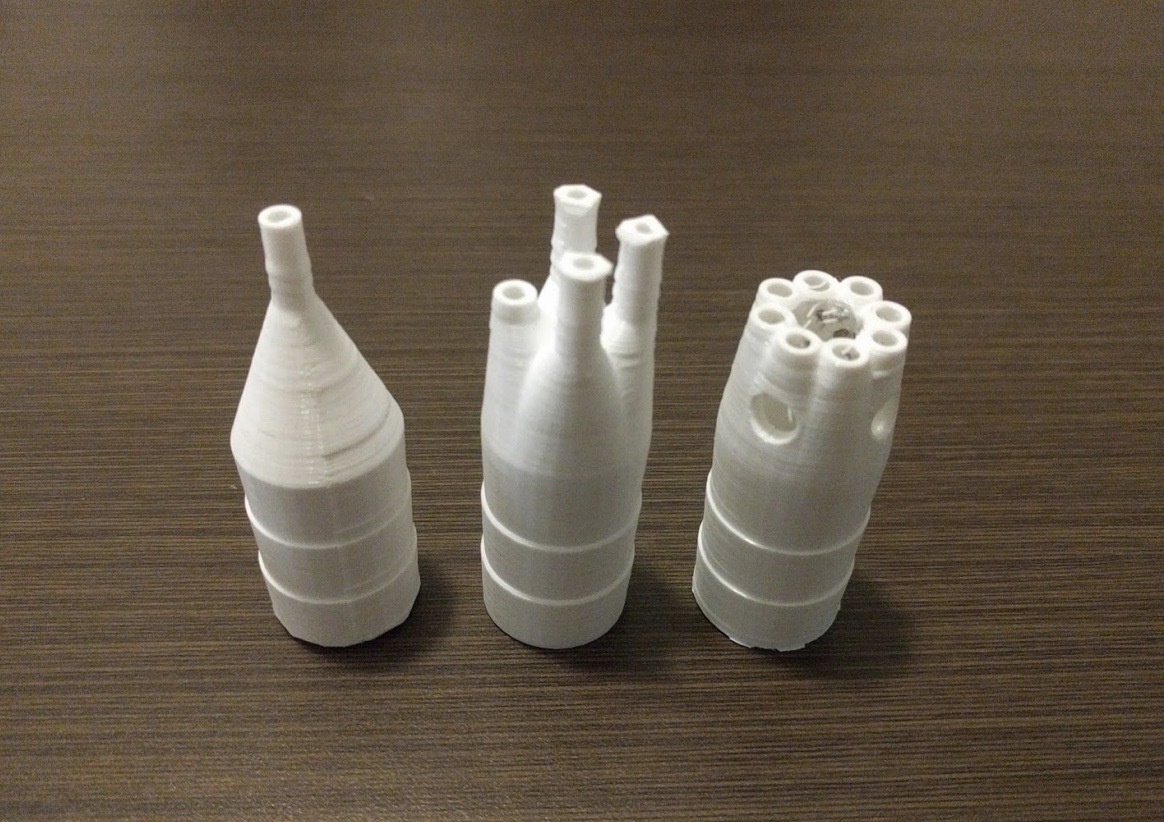
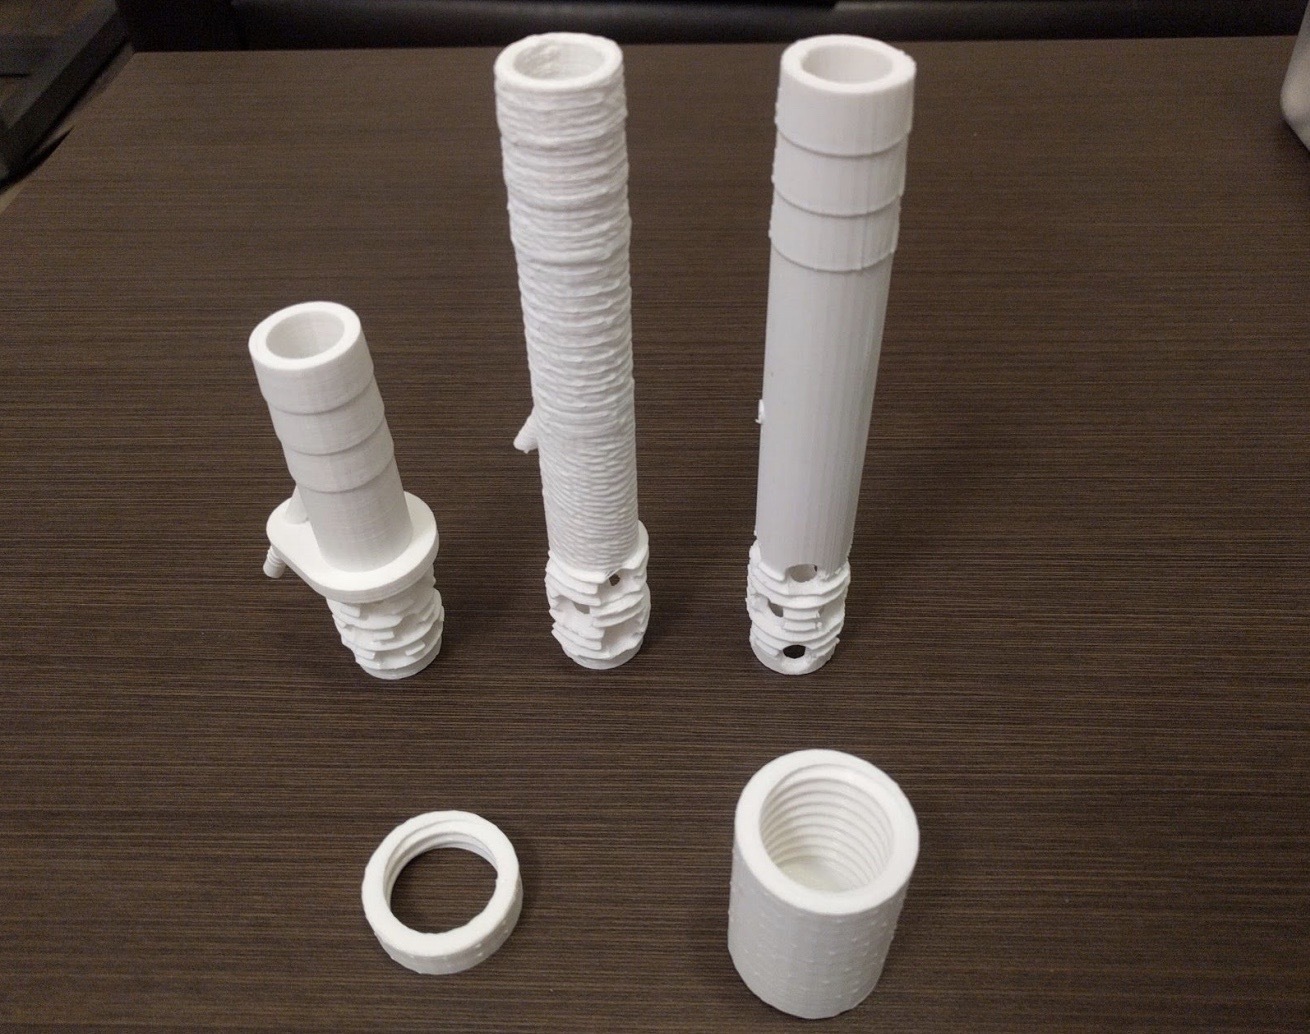
As stated in the introduction, being able to rapidly prototype is the greatest advantage of modern day 3D printing. For my team(Wavy), the majority of our parts would have to been special ordered and custom fabricated. When on a tight time schedule where there may only be a few weeks to deliver a product, this is not a feasible solution; it may take two weeks just for the part to arrive at your door. This becomes even more clear when realizing how little possibility there is for iteration. While it is certainly not impossible, working under the assumption that it would take 1 or 2 weeks just for a single iteration makes outsourcing parts would not work in the context of this class. However, when using a 3D printer, we were able to produce multiple iterations per day. Further, rapidly prototyping through a 3D printer not only let us change designs on a macro scale, but also on a finer micro scale. As seen below, we were able to make much smaller changes easily as it would only cost us a few hours, instead of days.
3D Printing — How to
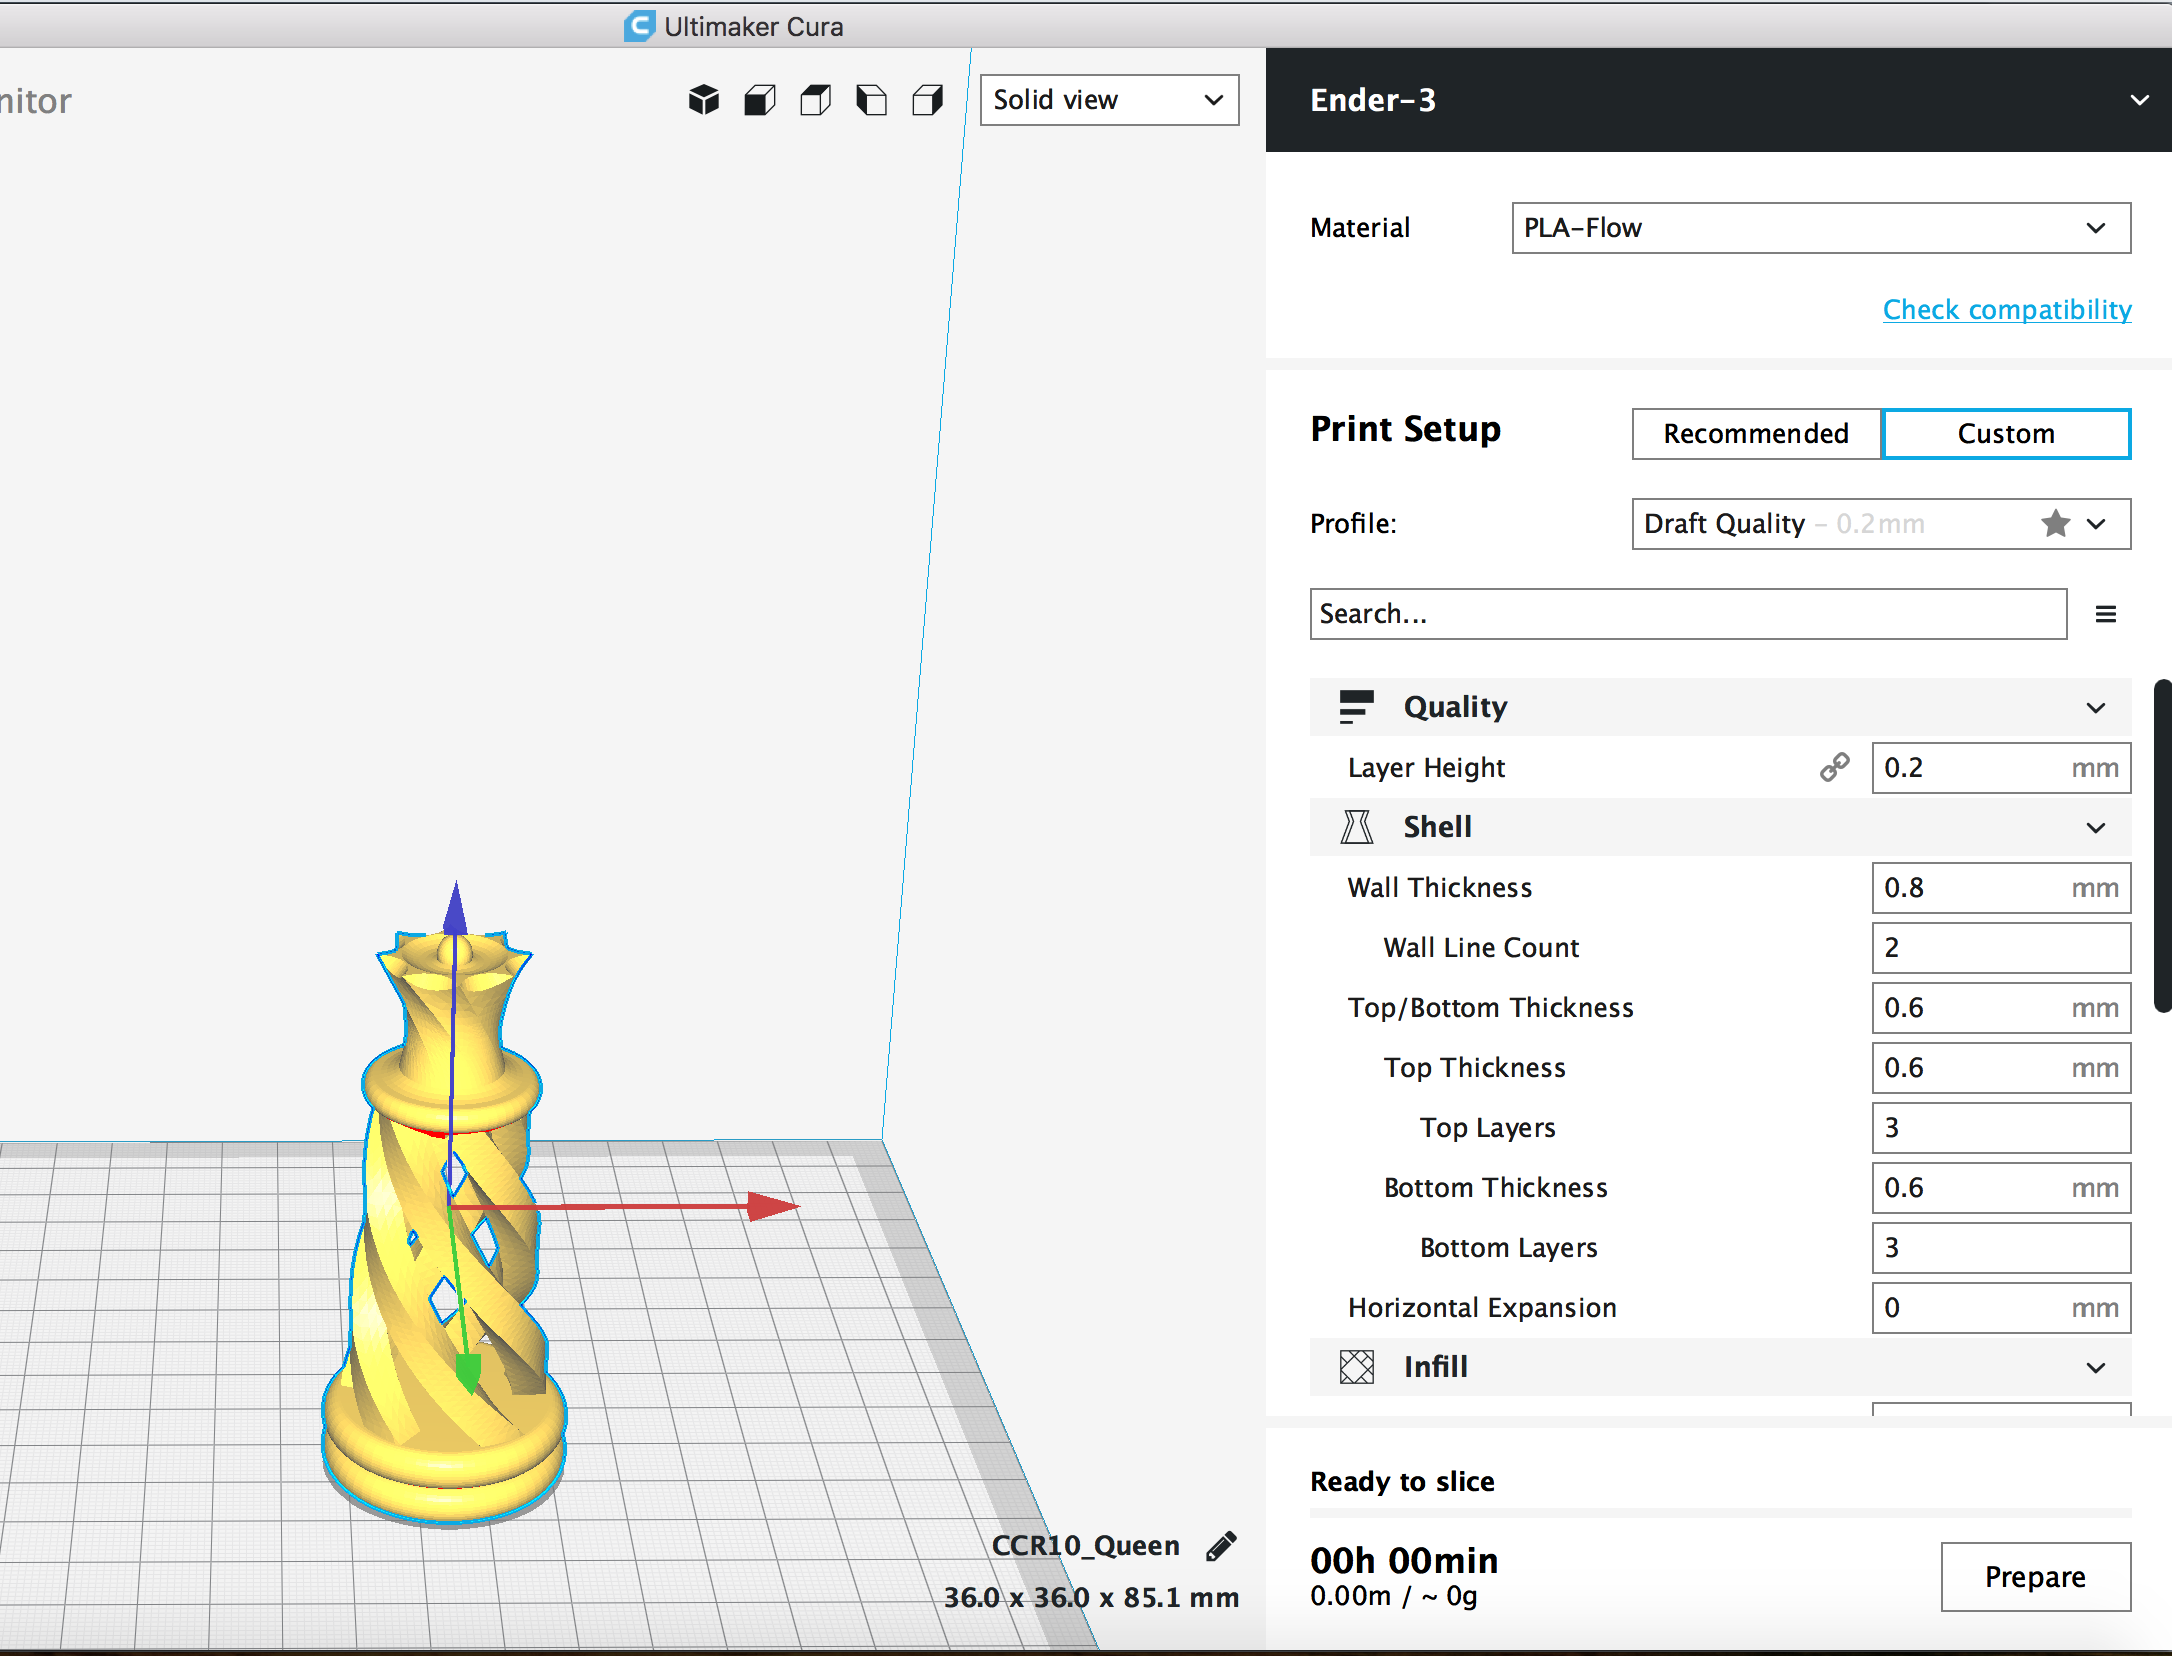
There are many ways to 3D print, however, a PLA printer is what most people will interact with. In essence, a printer will just heat up some filament(PLA), and extrude the semi-liquid material out of a head that moves across some printing area; and as a result of the material cooling off, the filament will harden and retain its’ new shape. When using a 3D printer, one of the most important things to have is an actual 3D model. These can be downloaded from the internet at websites such as https://www.thingiverse.com/, or you can make your own. The next crucial part of 3D printing is to have a piece of software called a slicer. A slicer will simply take a 3D model and convert it into a series of instructions a 3D printer can actually follow; it’s basically a compiler for 3D models. Below, you can see an image from my slicer when I was printing chess pieces. From this menu a user may choose many different options for how their slicer will compile source code for the printer. Once the source code is compiled, it just needs to be put onto the printer and run. In most cases it will either be by directly saving the compiled code onto a micro-usb and putting that in the printer, or directly plugging a computer in; from there it is simply just an issue of navigating the printer’s UI.
Optimizations – Settings
What most people may not realize is that printing a model that looks and works well can take a bit of optimization. The first setting that can impact quality is layer height; below you can see the effects that choosing different layers heights has. In essence setting layer height will correspond to how much detail will be given to the print. In reference to rapid prototyping and this class, generally, a larger layer height is desirable when iterating. The reason being when simply prototyping for functionality, you shouldn’t care about how aesthetic something is, but rather does it work.

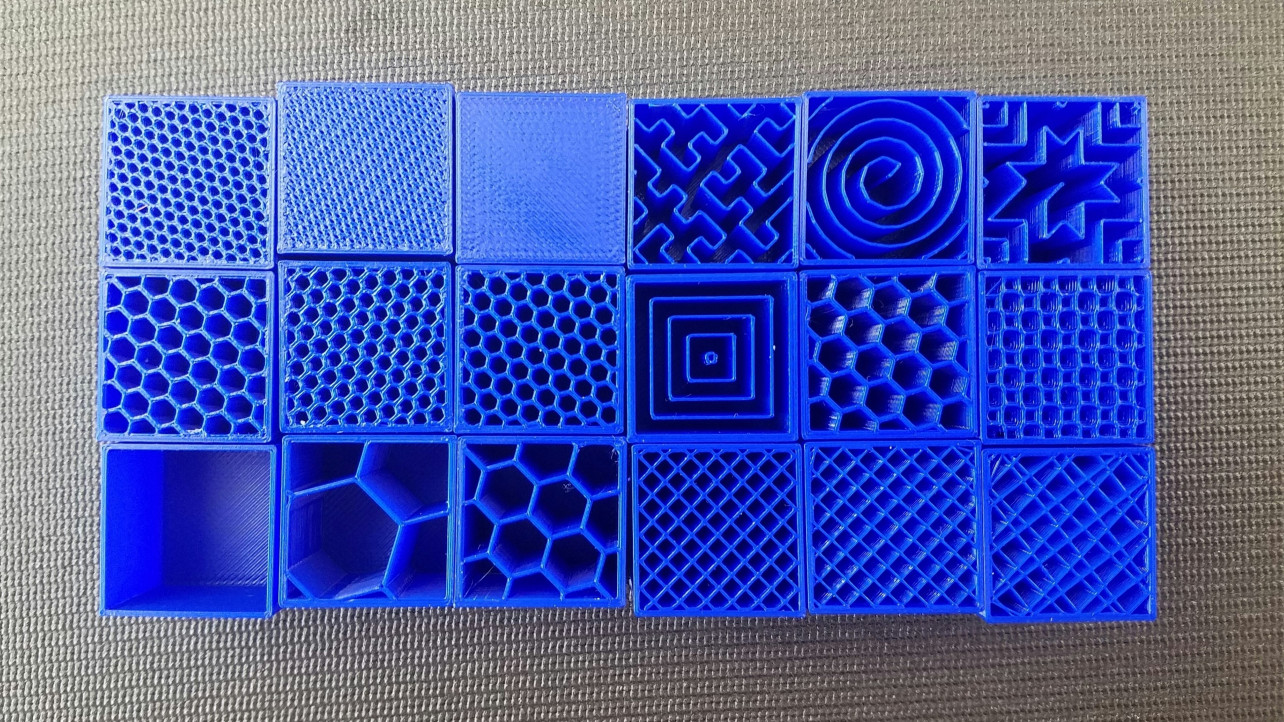
The next setting that can have a major impact is infill. A classic example is printing a hollow cube with solid walls. Since no one will ever see the inside it doesn’t necessarily need to be solid; this would also take much, much more time. Not only does infill give extra structural stability, but it can act as a supporting material to the top edges with large overhang so they do not become deformed under gravity. Choosing infill varies heavily by project as it’s basically a tradeoff of stability versus speed. Below can be seen comparisons of different infill patterns most slicers will support.
Finally, the last two important printer settings are print speed and print temperature. While at first thought temperature may not seem to have a huge impact looking deeper, that’s not the whole truth. Different printing filaments will have different melting points so it’s important to choose something appropriate for the situation. For reference, PLA has a melting point of around 180-220 degrees Fahrenheit; for this reason most suggest keeping a printer’s heat at 200. The important distinction to make here is that you do not want the filament to be too hot or it will get too runny and deform your structure’s shape. Likewise, if the filament is too cold it won’t actually change shape and the final model will be one straight, long, useless piece of PLA.
Lastly, printer speed is exactly as it sounds, the speed at which the printer head will move trying to dispense filament; for most slicers this will be represented as millimeters per second. This won’t have too much of a profound impact on overall quality, but if edges look rough or slightly misshapen it may help to turn this setting down.
Conclusion
In conclusion, the ability to 3D print parts is a new and great resource when trying to prototype. Being able to make non standard parts greatly increases a person’s options when designing essentially everything. More so, being able to go back and tweak small features is as well invaluable as this truly allows for great levels of optimization, not only in aesthetics, but also functionality. If you’re interested in prototyping some design with a 3D printer I have included resources below!
Resources
Virginia Tech Library free 3D printing service: https://spaces.lib.vt.edu/designstudio/
Thingiverse — A place where people upload 3D models ready to slice and print :https://www.thingiverse.com/
Ultimaker Cura — The slicer I use to turn 3D models into G-code(3D printer code): https://ultimaker.com/en/products/ultimaker-cura-software
Image Sources:
Rapid Prototyping Models: My team’s(Wavy) Milestone 2 presentation
Layer Height Comparison: reddit user JohnCenasLeftElbow
Infil Comparison: www.all3dp.com
Slicer Image: My own computer